18 May 2011

What I Wore Wednesday -- Grown Up Polka Dots, Copying Kate, and a Big Ol' Fail

When I started this blog, I mentioned that one of my goals was to hold myself accountable for getting our house in order.  Something I sure didn't anticipate was that participating in What I Wore Wednesday would not only shove me out of my yoga pant rut, but also inspire me to clean up (and out) my disaster area closet.  Huzzah for fringe benefits!

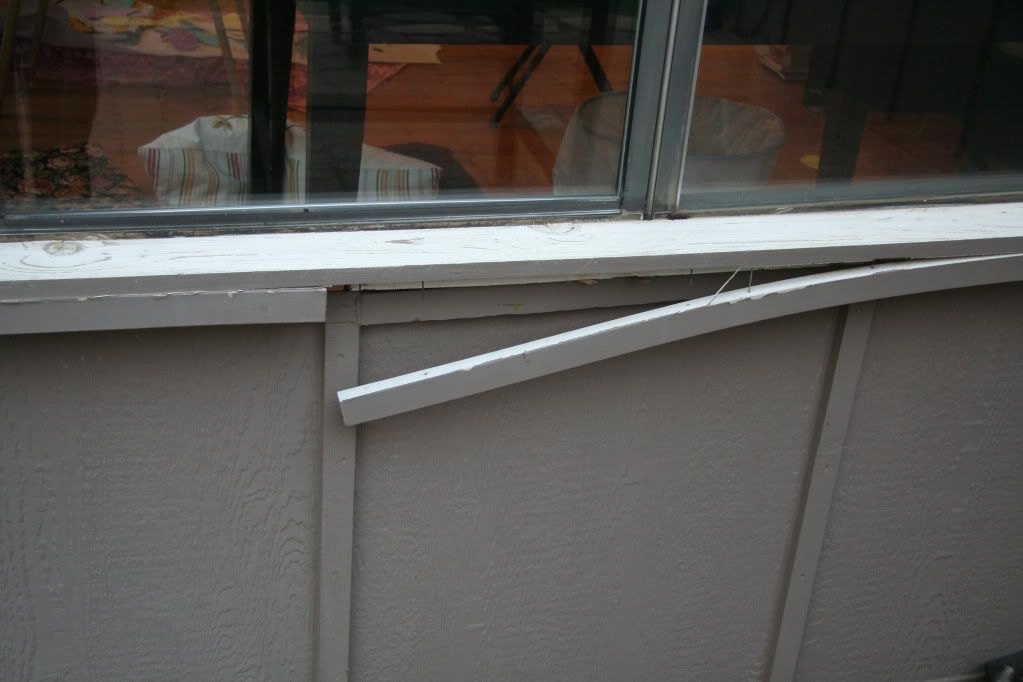
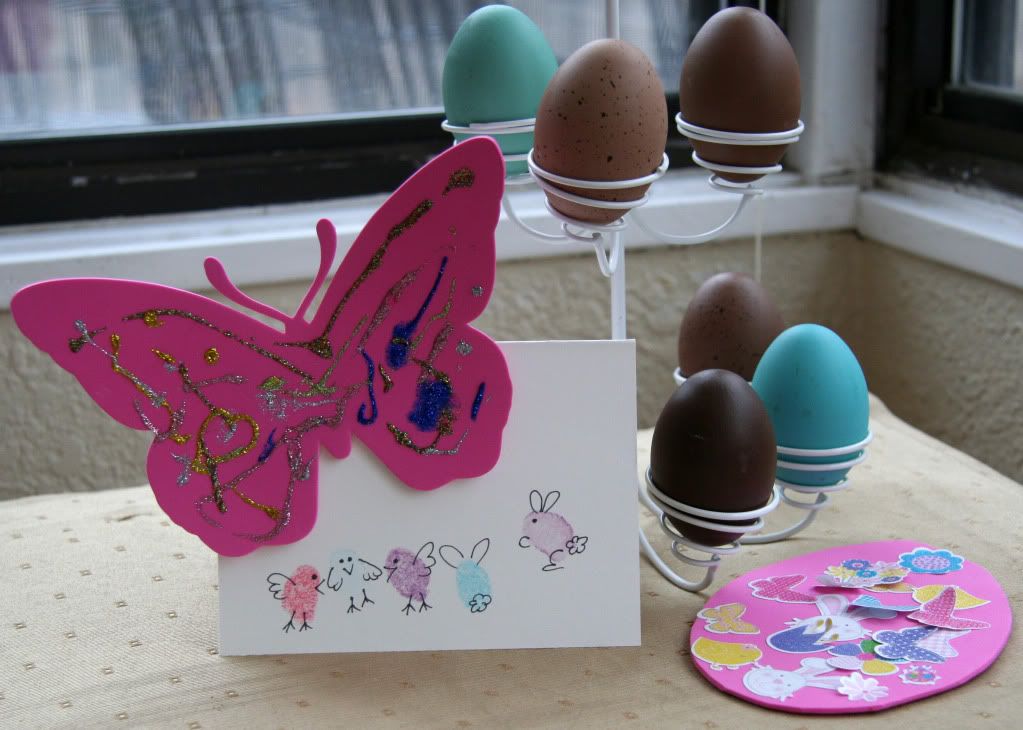
I'll show you the new & improved closet tomorrow, but suffice it to say for today that when you start off like this:


there's no place to go but up!

My first outfit this week is my attempt at grown-up polka dots.  I brushed against this dress at Target and it was so soft I had to give it a second look.  And for $24.99, I couldn't pass it up!


Dress:  Target
Black canvas wedges:  Payless

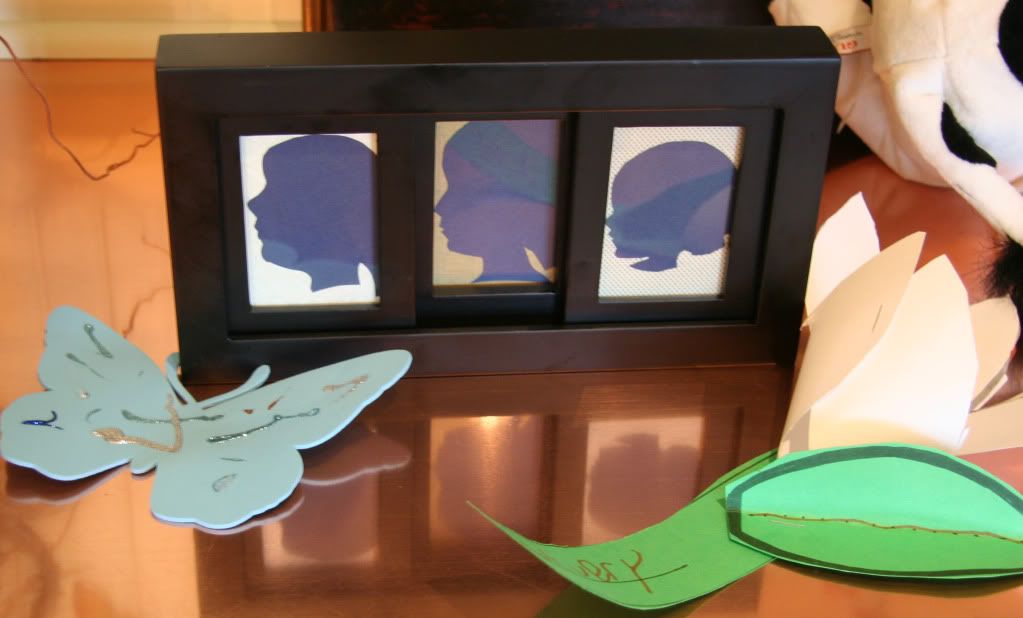
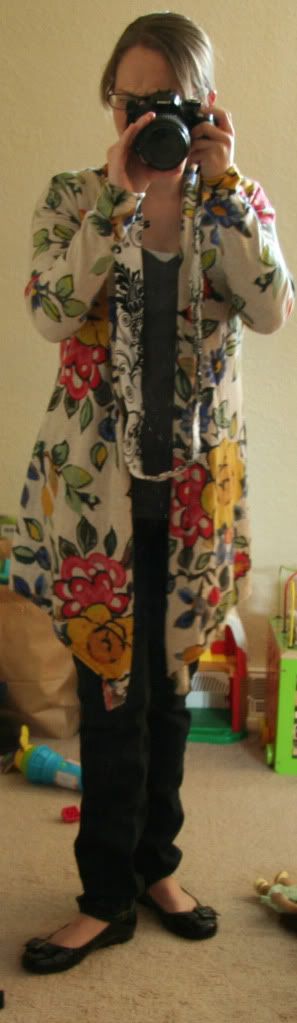
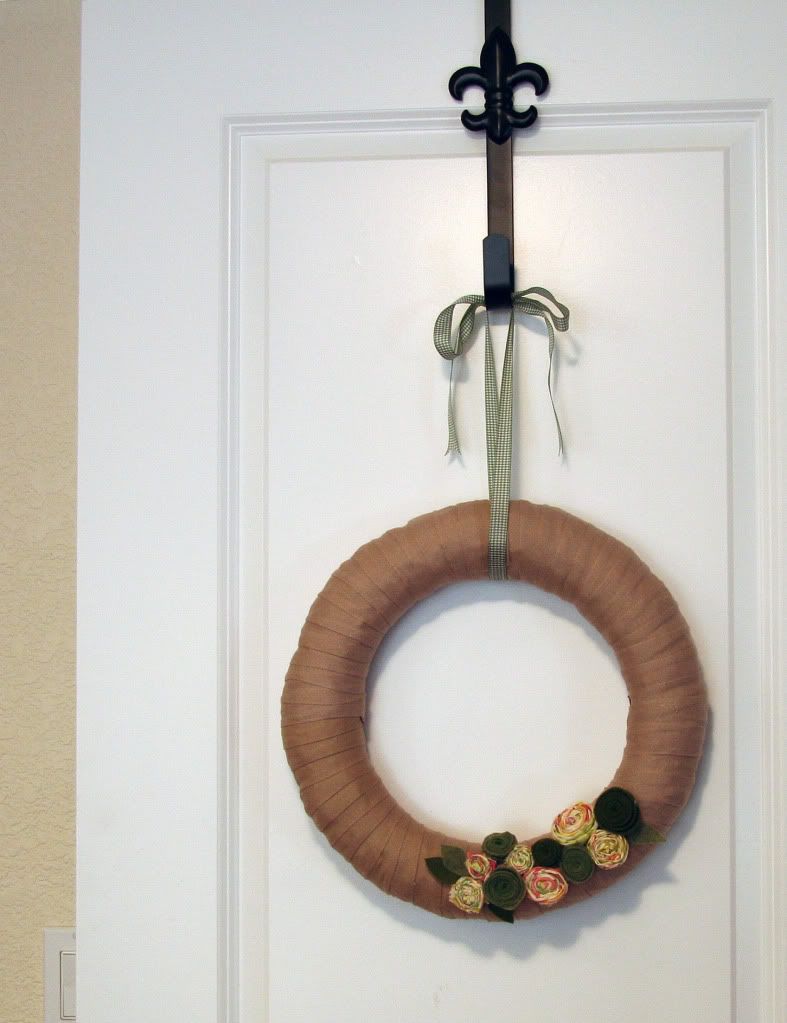
Did you watch the royal wedding?  With my Princess-obsessed AJ, it was a BIG DEAL at our house.  I fell in love with the simple silhouette of the jacket Kate Middleton wore the day after.


Source: None via celyna on Pinterest


So when I saw this jacket had the same neckline, I was intrigued.  And since dressing up is not my usual M.O., the fact that it's made of sweatshirt material and perfect to throw on over jeans = SOLD!


Jacket:  Target
gray t-shirt:  Ann Taylor Loft
Jeans:  Hudson, via Nordstrom
socks:  handknit by yours truly
shoes:  Danskos, via Zappos

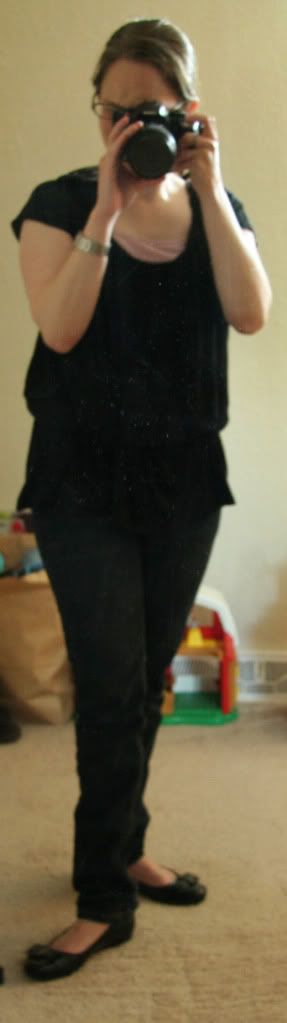
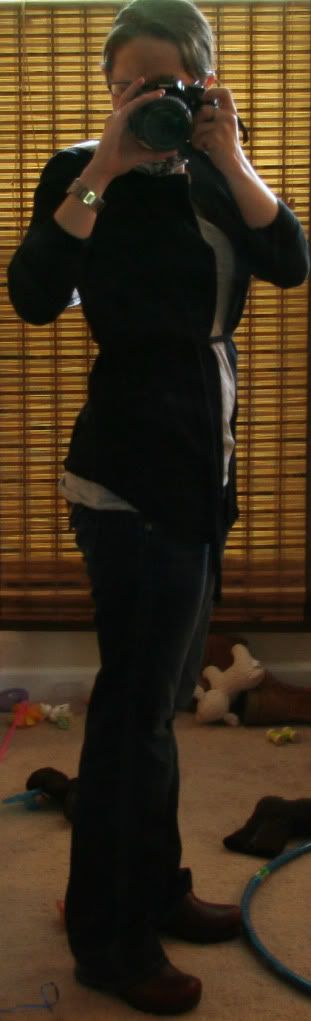
Finally, today, inspired by my friend Grace , who has *awesome* style (she does a series where she picks clothes for her readers -- I don't think I've ever not liked something she's chosen and she could totally be one of those personal shoppers who charges hundreds of dollars per hour.  She's also wickedly smart, funny, and a great writer, and the one who finally convinced me to try skinny jeans.), I threw on a pair of black leggings and a t-shirt dress with a belt, and some ballet flats.  I've seen Grace rock this look more than once, so when I stepped in front of the camera (trying to figure out the self-timer), I thought I looked ok.  
Apparently the camera disagreed, (and frankly, I don't really blame it) because the resulting shots were blurry and downright terrible.  A big fat fashion FAIL.  The belt was too low, so I had a bit of 80's punk - revival going on, the dress is a bit too big (both from the unfortunate post-partum period where you can't wear your regular clothes, but can't bear to wear maternity for one more second), so I looked like I donned a purple potato sack.  Both are now in the donate pile, and I will spare you the sight.  You're welcome.

Linking to What I Wore Wednesday !

17 May 2011

Mango Chutney-Glazed Short Ribs

I am always on the lookout for recipes that are easy, delicious (of course), and don't require a lot of babysitting, since my kids seem to regard meal prep time as their own competition time to see who can drive Mama round the bend the fastest.  This "witching hour" means that I pink sparkly puffy heart my crock pot, since I can just chuck everything in during nap time and forget about it for a couple of hours.

I adapted this recipe from one a friend passed on.  This night I served it with mashed potatoes and roasted cauliflower (I usually try for a more colourful meal, but was trying to use these up before they went bad), but they are also good with rice (for a more Indian meal) or polenta.  You can also double or triple it to have a seemingly fancy meal for a crowd.  They're so popular in our house that every time I see short ribs on sale I have to put this on the menu!

Ingredients: (Serves 4)
     2 pounds (about 8 pieces) beef short ribs
          (note:  you can also use beef chuck short ribs, but will need to increase the cooking time)
     1 small onion, sliced
     kosher salt and ground black pepper, about 1 tbsp. each
     1 tbsp. Worcestershire sauce
     1 jar mango chutney
     1 cup beef broth
     2 tbsp. tapioca

First, slice your onion thinly and place in the bottom of the crock pot.


This is the bed for your short ribs.  Next, rinse the ribs and pat dry, then sprinkle both sides with kosher salt and black pepper.  Put them bone-side down on top of the onions.


Spread the mango chutney over the short ribs.  Pour the Worcestershire sauce, broth and tapioca around (but not over -- don't wash off the chutney!) the ribs.


Cover and cook on low heat about 4 hours, or until the meat is falling off the bones.


Enjoy!
Linking up to:  Make Something Monday , Tasty Tuesday , Handmade Tuesdays and Show Me What You've Got !

15 May 2011

On Change, and Uncertainty

I guess Blogger and our weather have been colluding lately, seems neither likes change!

Now that blogspot seems to have its hiccups ironed out, I can show you what our big weekend project was!
When we bought our house a few years ago it wasn't in perfect shape.  The previous owners had fancied themselves do-it-yourself-ers, and enclosed the previous back porch into a sun room.  Unfortunately, they picked crap windows to do so.


And did I mention that they didn't square them?  Or angle the outer sills downward to divert rain?

Or level the floor?  And used the crappiest, cheapest wood to try to trim?


In other words, they were in sorry shape.  They barely kept out wind and rain, we won't even talk about how we were bleeding money in utility bills from losing all our heat or air conditioning through the thin glass.  So (needless to say) it was high time they got replaced!

Our first step was to wreak absolute havoc on the entire house by clearing everything out of the sun room.  Dining table, chairs, my craft table, my computer armoire, the kids' easel, a ton of books, crafting supplies . . . . you get the picture.


We finished close to midnight, and expected the installers early the next morning.
Mother Nature, however, decided she wasn't quite through with winter yet.


That would be a mix of hail, sleet, and snow.  Not quite the weather you want when you're scheduled to have a gaping hole in your house.  So everything got pushed back a couple of days.  The kids loved having the big open room to run around in, they were most fascinated by how much more their voices echoed without the furniture and dubbed it "the echo room."

Finally, the weather cooperated and the big switch happened.  There were quite a few surprises lurking, including:
*rotten wood under all the old windows (because of the aforementioned lack of rain diversion)
*a large wasp's nest
*electrical conduit run between the window frame and the wood framing of the porch wall
*zero insulation in the entire room
and the piece de resistance, the fact that the previous owners had framed the back door in cedar batten board.  Like, what you'd line a closet with.  No joke.  Sigh.

So.  After all that, are you ready to see the new, properly installed, properly flashed, properly insulated, levelled, squared, energy efficient and (if I do say so myself) completely gorgeous new door and windows?


The french-styled sliding door:


The side where most of the issues were:


Isn't it gorgeous?
We are so pleased.
Of course, now that we have these pretty new windows, we're thinking a few more touch-ups may be in order -- a fresh coat of paint, building a couple of window seats, maybe a new rug . . . . .


Z. wants to be involved in the design process.  Though he's being awfully picky about which shade to choose!


I'm linking to Weekend Wrapup at Tatertots & Jello !

11 May 2011

A New Take on Photo Gifts


Is there anything grandmas love more than pictures of grandkids?

For Mother's Day I usually give photo gifts to my mom and mother-in-law.  This year I decided to change it up a bit and give silhouettes.  I used the tutorial at Design Sponge and I love how they turned out!
Each of the girls also gave one of their own craft projects -- Ellie decorated the butterfly with glitter glue and AJ made a lily from construction paper and cardstock.

Linking up to Homemaker on a Dime's Creative Bloggers Party Hop , Get Your Craft On at Today's Creative Blog , Made by You Monday at Skip to My Lou , Lil Luna Link Party ,  Blue Cricket Designs Show & Tell Wednesday , What I Made Wednesday at Sweetpeas & Bumblebees , Tatertots & Jello's Weekend Wrap Up!

09 May 2011

Makes It All Worthwhile -- Mother's Day Musings

A belated very Happy Mother's Day!

I had the best of intentions of blogging yesterday, but Mr. Z had some other ideas -- namely, trying to deal with 4 molars coming through at the same time by being on me at all times and crying hysterically if he wasn't.  "Happy Mother's Day, mama, I'm celebrating by being absolutely miserable and making you lose your mind!"  Sigh.

As trying as these kind of days are, I also relished having lots of snuggle time with Z.  There's something about having a baby's heavy head resting on your shoulder and feeling them relax completely that makes it easier to get through the moments when they're screaming in pain and you're at wits' end trying to make it better.

So I spent much of yesterday blog-surfing, and discovered Kami from No Biggie doing a series of posts with other bloggers on 5 Things I Love About Being a Mom.  They inspired me to come up with my own list.

5 Things I Love About Being a Mom

1.  Falling in love with my husband all over again as I see what an amazing Daddy he is.

2.  Being able to fix anything, even if it's just with a hug and empathy.

3.  Seeing each of my children develop their own distinct personalities (and sometimes wondering where on Earth they got certain characteristics from).

4.  Having 3.  I was raised basically an only child, and I am so thankful that my kids have built-in playmates, role models, and partners in crime.  Watching their sibling relationships grow is often mystifying for me, but also hilarious ("make her stop looking at me!") and touching ("I don't want Zachy to be afraid of the dark, so I'm letting him use my nightlight").

5.  Seeing the world through new eyes as they learn & discover.


04 May 2011

Breaking Out of the Yoga Pant Rut

Can I jump on the "I'm sick of wearing yoga pants all the time" train? 

Lindsey over at The Pleated Poppy started "What I Wore Wednesdays" to catalogue her fashion adventures, and I'm excited to join in! 

First, going out to dinner with the family, otherwise known as "finally trying out the skinny jean trend":


sweater:  Anthropologie, via eBay
v-neck gray tee:  Old Navy
white nursing tank:  glamourmom
skinny jeans:  Target
flats:  ecco, via Nordstrom  (thanks for the birthday present, Mom!)

Next, what I wore today to attend Ellie's preschool class Mother's Day Program:


tunic:  Gap, I think five or so years ago.  One of my faves!
pink nursing tank:  glamourmom
skinny jeans:  Target
flats:  ecco, via Nordstrom (I pink sparkly puffy heart LOVE these shoes)

Linking up to What I Wore Wednesday !

01 May 2011

Teacher Appreciation Gifts -- Fabric Flower Pen tutorial


This coming week is Teacher Appreciation Week at AJ and Ellie's school.  Every year, each kid gets a paper lunch sack with a letter on it, and the gifts for both teachers must start with that letter *and* fit in the bag.  Ellie's letter was "G" and AJ's was "Y."  Not wanting to go with yo-yo's, Yoo-Hoo, yak figures, gum, grapes, or gimp lanyards, I decided to harness my current passion for making fabric flowers and give something useful, too.  So AJ's teachers are getting yellow flower pens/pencils, while Ellie's have a garden of many colors.  (Stretching it?  A bit.  I think the cute makes up for it, though.)


Here's how I did it:

First, I cut 1/2" strips of green felt to wrap around the pen as the stem.  I left enough room at the bottom to grip the pen normally; for the pencils, I wrapped to halfway down to leave room to sharpen.  Attach with a bit of hot glue.  At the top/eraser, I glued down the felt over the top to give the fabric flower a better surface to grip to.


For the flowers, I used my rotary cutter to cut two strips for each bloom of various widths from fat quarters of quilting fabric -- up to 3/4" for the biggest flowers.  Tie the strips into a knot, fold the top ends into the knot and secure with hot glue.  I found that having a large center helped balance the flower on top of the pen, and helped in the next step of showing both sides of the fabric.


Now, twist the strips individually, then twist together and start wrapping the twisted strips around the center, hot gluing every so often to hold it together.


When you get to the end of the flower, glue the remaining "flap" down to the underside of your flower.


You can see how this method gives a very "shabby chic" sort of bloom, with lots of twists and texture.

Next, I cut leaves from green felt, leaving a bit of a "stem" at the bottom, and glued it to the top of the pen.


Finally, glue the flower onto the top!


I grouped two pens and one pencil together for each teacher, and then tied the bundle with yellow ribbon.  I printed out these adorable, edit-able tags that say "Thank You for Helping *Name* Bloom" from Skip to my Lou , glued them onto some scrapbook paper, and tied it on.


I'm really excited for the girls to give these "bouquets" to their teachers!


I'm linking up this post to Sew Darn Crafty at Sew Many Ways , Tatertots & Jello Weekend Wrap-Up , Whatcha Got Weekend at lollyjane boutique , Green Door Designs Saturday Spotlight , Think Pink Sunday at Flamingo Toes , the Monday link party at CraftOManiac , Made by You Monday at skiptomylou , Make Something Monday at Sarahndipities , Made with Love Mondays at SewChatty , Inspire Me Mondays at Homemaker in Heels , Show Me What You've Got at Not Just a Housewife , Handmade Tuesdays at Ladybug Blessings , Creative Juice Thursday at Momnivore's Dilemma , Sugar & Spice at seven thirty three , Get Your Brag On at Gluesticks and Get Your Craft On at Today's Creative Blog !

26 April 2011

Mexican meh -- Chicken Enchiladas with Red Chiles & Cheese

I love Mexican food.  Capital-L Love.  Chile rellenos, enchiladas, guacamole, nachos, you name it, I love it.  I've perfected a few recipes to make at home -- carnitas, Chipotle-inspired soft tacos and burritos, refried black beans -- but I am still trying to make enchiladas that are as good as our local hole-in-the-wall for those nights hauling 3 kids out to dinner just isn't going to happen.

Thanks to Pinterest , I found this Rick Bayless-inspired recipe on Elly's blog and decided to try it out.  After all, Rick Bayless is (at least according to my impression watching Top Chef Masters ) the go-to dude for accessible Mexican recipes.  I should've known not to trust a white guy with a soul patch.  *shakes head sadly*

Anyway, the original recipe and Elly's adjustments are on her blog.  Here's what I used:

*6 medium-size dried guajillo chiles, stems removed
*4 cloves garlic
*1 28-oz. can fire-roasted tomatoes and their juice
*1/4 tsp. ground cumin
*1 tsp. ground black pepper
*1 cup chicken broth
*3 shredded chicken breasts
*1/2 white onion, plus a bit diced for garnish
*10 corn tortillas
*4 oz. shredded Oaxaca cheese
*diced avocado for garnish

First, I seasoned the chicken breasts with salt & pepper, granulated garlic, and oregano and roasted them at 375 for 30 minutes.

I toasted the dried chiles in a dry saucepan over medium heat and flattened them with a spatula a couple of times, then chucked those, the garlic, the tomatoes, the cumin & pepper into my food processor and blended until it was smooth.  I pressed it through a fine sieve and put it on medium heat to reduce.
When it was about the consistency of tomato paste I added the chicken broth.


While the sauce simmered, I set the oven to preheat to 350 and put the tortillas in to warm.  After about 10 minutes, I poured about a cup of the sauce into the bottom of a 9 x 13 glass pan and mixed about 1/2 cup of sauce into the shredded chicken.
To assemble the enchiladas, I dipped both sides of a warmed tortilla into the remaining sauce, then filled it with chicken, rolled it, and placed seam-side down in the pan.  Once they were all assembled, I poured the remaining sauce over them, sprinkled the cheese on and popped it in the oven for 15 minutes.


Overall, this dish was OK.  It wasn't quite hole-in-the-wall good, but it was decent, and Darling Husband really liked it.  The sauce, even though I added two more chiles, two more cloves of garlic & the onion *and* left out the sugar that Bayless' original recipe calls for, was kind of bizarrely sweet.  If I try this recipe again, I'd like to try it with plain tomatoes to see if that makes any difference.

If anyone has a fabulous enchilada recipe, please share!
Linking to Handmade Tuesdays at Ladybug Blessings , Tasty Tuesdays at 33 Shades of Green and What I Made Wednesday at Sweet Peas & Bumblebees !

25 April 2011

Goalposts: The Obvious Edition

Last week I laid out some of the goals I'm hoping to hold myself accountable to.  First up?

A Cleaning Schedule That Involves the Kids.
I spent a lot of time this weekend thinking about how I envision the house looking, what makes things easier for me, what age-appropriate chores the kids can help with, and how much (or little, in the interest of honesty) time I'm willing to devote to cleaning.  Here's what I came up with:

*I envision the house looking like something out of a magazine.  However, I loathe cleaning.  While the two aren't mutually exclusive, they are at odds.  Add 3 kids, a cat that sheds tumbleweed-sized fur balls and a desire to spend no more than 30 minutes per day cleaning, and the first thing I need to do is lower my expectations and don't let the desire for perfection get in the way of just getting something done.  

*Thinking about what makes things easier for me led directly to my list of chores to do every day:
     *putting the kitchen to rights (loading dishes, wiping 
       counters, putting away placemats, getting the coffee 
       maker ready for the next morning) every night.
     *scooping the cat box (on Wednesdays, change the litter 
       completely since trash day is Thursday)
     *clean off my side table (next to the couch)
     *take recycling out to bins.


*I am extremely lucky to have a cleaning dude twice a month (best birthday/Christmas present EVER, mom!).  Because of that, my list of chores to do weekly is pretty short:
     *vacuum tv room twice a week
     *vacuum rest of house
     *change sheets on beds
     *change towels in kitchen & bathrooms
     *water plants (inside & out)
     *laundry:  Z, the girls, mine, sheets & towels
       (darling husband does his own)
     *wipe down bathrooms

*The girls (5 and 3) can most definitely help with keeping things clean.  As Z gets older he'll be expected to help, too, for now we'll model picking up toys after we're done playing.  We tried breaking down chores between AJ and Ellie, and usually ended up with "but I wanted to do that!", or "but why do I have to do my chore now and she doesn't?"  So for now, the chore belongs to both of them (especially since they'll need supervision).  Their chores:
     *put away placemats & take napkins down to laundry
     *wipe off table after meals
     *take recycling out to bins
     *water outside plants


Right now I am writing the list down in my dayplanner so I can make changes as we start out, but eventually I want to have a checklist with daily and weekly chores.  For the girls, they each have a dry-erase chore chart like this:
This is what the lists look like broken down:

You can see on the bottom my meal plan for the week.  Which brings me to my second goal:  get 5 fruits and vegetables every day.  Thanks to the stomach bug the kids all shared last week, I've mainly been concentrating on my eating.  It quickly became apparent that in order to get 5 servings in, I need to actually feed myself.  In other breaking news, water is wet, and fire is hot.
Seriously, though, there are too many days when all I've had is coffee for breakfast, yoghurt or a granola bar or a couple bites of the kids' PB&J for lunch, and then I'm cranky and craving chocolate and not carrots.  So in addition to planning out the dinner vegetables, I'm making an effort to have something in the morning.  My favourite so far?  A green smoothie!
There are tons of links to recipes online, but I've kind of winged it with the stuff I've got in the fridge and I haven't been disappointed yet.  A little milk, some strawberries, blueberries, or banana, a big handful of kale and a couple of ice cubes (to make it frothy), et voila! My only issue is with our POS ancient blender, but I'm adding this to my wish list -- supposedly as good as a Vitamix yet $400 cheaper!


Later this week I'm going to share how we're trying to incorporate the other 5 things -- time to create, be outdoors, learn, exercise & clean into our schedules.  I'd love to hear what goals your family has & how you're working towards them!

24 April 2011

Easter Run-Down

This Easter, we had a bit of ham, thanks to AJ.

Ellie, who is still not feeling 100% after being sick this week, provided some w(h)ine.

And Z just gave us his big sad face when he was more than a few inches away from Mama.

We did do a bit of crafting -- the girls cut out Easter eggs and butterflies from sheet foam and went to town with glitter glue and stickers, and I borrowed their thumbs to make "Hoppy Easter" cards (thanks for the inspiration, Sarahndipities !).
Hope everyone had a wonderful day!

I'm linking to Everything But the Kitchen Sink at A Little Knick Knack , Weekend Wrapup at Tatertots and Jello , What'cha Got Weekend at lollyjane boutique and Make Something Mondays at Sarahndipities today!

20 April 2011

Spring Crafty Show-Off

Inspired by the rest of the blogosphere, I decided the house needed a bit of "Spring-ing Up."  This wreath is now hanging on the (always open) door to our basement.

Here's a close up of the fabric & felt flowers:

This was ridiculously easy to make!  I picked up a straw wreath form at my local craft mecca and broke out the glue gun.  I've seen some that used strips of burlap to cover the wreath, but craft mecca didn't have any, so I used similarly-textured brown ribbon and hot glued it in place.
Then came the fun part!  There are lots of tutorials on how to make rolled fabric flowers and felt rosettes, I followed those and then clipped a few felt leaves.  A few more dabs of hot glue, a ribbon to hang it, and now we have a little touch of spring!
I may or may not also now have an addiction to making these flowers.  They're super cute -- they can fancy up jewelry, clothes, even a lampshade -- I'm thinking this would go so well in AJ's shabby-chic-ish bedroom.
I'm linking up this post to Wow Us Wednesday at Savvy Southern Style , Nifty Thrifty Tuesday at Coastal Charm , What I Made Wednesday at SweetPeas & BumblebeesCatch a Glimpse Thursday at A Glimpse Inside , Handmade Tuesday at Ladybug Blessings , Saturday Spotlight at Green Door Designs and Creative Juice Thursdays at Momnivore's Dilemma.  I'd love to know what you think!

It's All in the Journey, Right?

We are still mostly laid up.  Ellie now has the stomach bug, I am still breathing-challenged, and AJ & Z. are in the whiny-wounded-tiger stage, where they want nothing more than to be on my lap constantly and react to any of my suggestions for feeling better with growls and tears.

So, where do we go from here?

Besides the obvious get-to-the-point-we-can-leave-the-house-again, I've broken up all my wishes & wants into 3 categories:  the home, the family, and the mama.  I fully expect these to evolve over time (hopefully as goals are achieved!), and I'm trying to not set us up for failure by radically changing a bunch of things overnight.

The Home
Most of the time our house is in a state of CHAOS -- Can't Have Anyone Over Syndrome (to borrow a phrase from FlyLady).  Darling Husband and I are constitutionally rather disorganized & dislike cleaning, so we do what's necessary (dishes, taking out the trash), but have no routine.  We haven't gotten the kids involved beyond the occasional "please take your plate to the sink" or "let's pick up all the legos before bed", and most of our stuff doesn't have a particular place to go.  The goal here is to set up a cleaning schedule and get the kids involved.

The Family
 Recently on Say Yes to Hoboken, Liz wrote something that resonated with me:  everyone needs 5 things every day -- time to be creative, time to be outdoors, time for learning, time for exercise, and time for cleaning.  I can't remember the last time we got all 5 in.  Another part of this is our nutrition.  When I mentioned an appalling lack of vegetables in many of our meals in my introductory post, I wasn't kidding.  Fruit, too.  So I'm calling this goal get 5 squared every day -- 5 fruits or vegetables for everyone, and the 5 times for creating, being outdoors, learning, exercising, and cleaning.


The Mama  (that'd be me)
Save for a couple of short-term projects, I haven't worked since AJ was born 5 1/2 years ago.  I am a lawyer by training, but I've let my skills lapse.  I don't have any immediate plans to return to work, but I have been feeling that my brain cells are starting to atrophy.  Plus, in order to keep my license (and I don't fancy taking the bar exam again), I need to take some continuing education classes.  My goal is completing my CLE classes before the end of the year.


I'd love to hear what goals you have, or suggestions on how you've accomplished similar things!

18 April 2011

Here We Go!

Heya!
I'm Erin.  I'm currently a stay-at-home-mom to 3 littles.  My oldest daughter AJ is 5, Ellie is 3, and my boy Z. is 16 months.  I spend most of my time wrangling them, but I also have a bad case of the "crafties."  I knit, sew, scrapbook, and am always improving things & decorating around the house.
So why am I blogging (besides wanting to share my crafty results with someone besides my bemused darling husband)?
We've had quite a trying season around here.  At least one of the 5 of us has been sick continually since October; currently, AJ and Z are both recovering from stomach flu and I've been waylaid by pneumonia.  A few things need to change around here -- things are messy & disorganized, we watch WAY too much tv, and there is an appalling lack of vegetables in many of our meals.
"Molior familiae" translates to "building the family", and that's what I'll be blogging about -- building new routines, healthy habits, home improvements, family projects.
I'd love to have you join in on the journey!  If you want to get email updates or notification of new posts, there are subscription options in the sidebar.  I welcome comments, questions and suggestions, too, just click "email me" or the "comment" link under any post.